I had some time, and we had some TV’s hanging on the wall wasting space. So I decided to create a dashboard that could put some useful information on these TV’s for everyone to see
Previously we were utilising the chromecasts with Greenscreen, and it worked well, but had its issues (probably more related to the chromecasts, not the software) but we weren’t using it as a useful dashboard, more just to scroll through some website links and display the occasional funny gif
This stopped working for us when they updated the way to talk to the chromecasts :( So instead of fixing it, I decided to find something else to do the job, and a cool dashboard to go with it
Setup
So I installed everything under Debian virtual machine, that’s running both the dashboard, and the dashboard controller with 1gb RAM. I eventually plan to have it all running on a raspberry pi. More on that when I get around to it!
So go ahead and spin yourself one of these up, and when you are ready, install the following dependancie s (apt-get)
- nodejs
- avahi-utils
- avahi-daemon
- libavahi-compat-libdnssd-dev
- Ruby (>1.9)
(npm)
- bower
- grunt-cli
- fd
note: To install additional widgets once dashing is setup - dashing install [gist ID]
Dashboard
So a year or so ago, I stumbled upon Dashing. At the time I used this awesome framework to build a dashboard for home, so I could view/control my automated home from a wall mounted tablet in style. Very out of date, but see home dashboard
This took a bit of tinkering to get it to display things how I wanted, and I had to learn some ruby along the way, but all part of the fun. 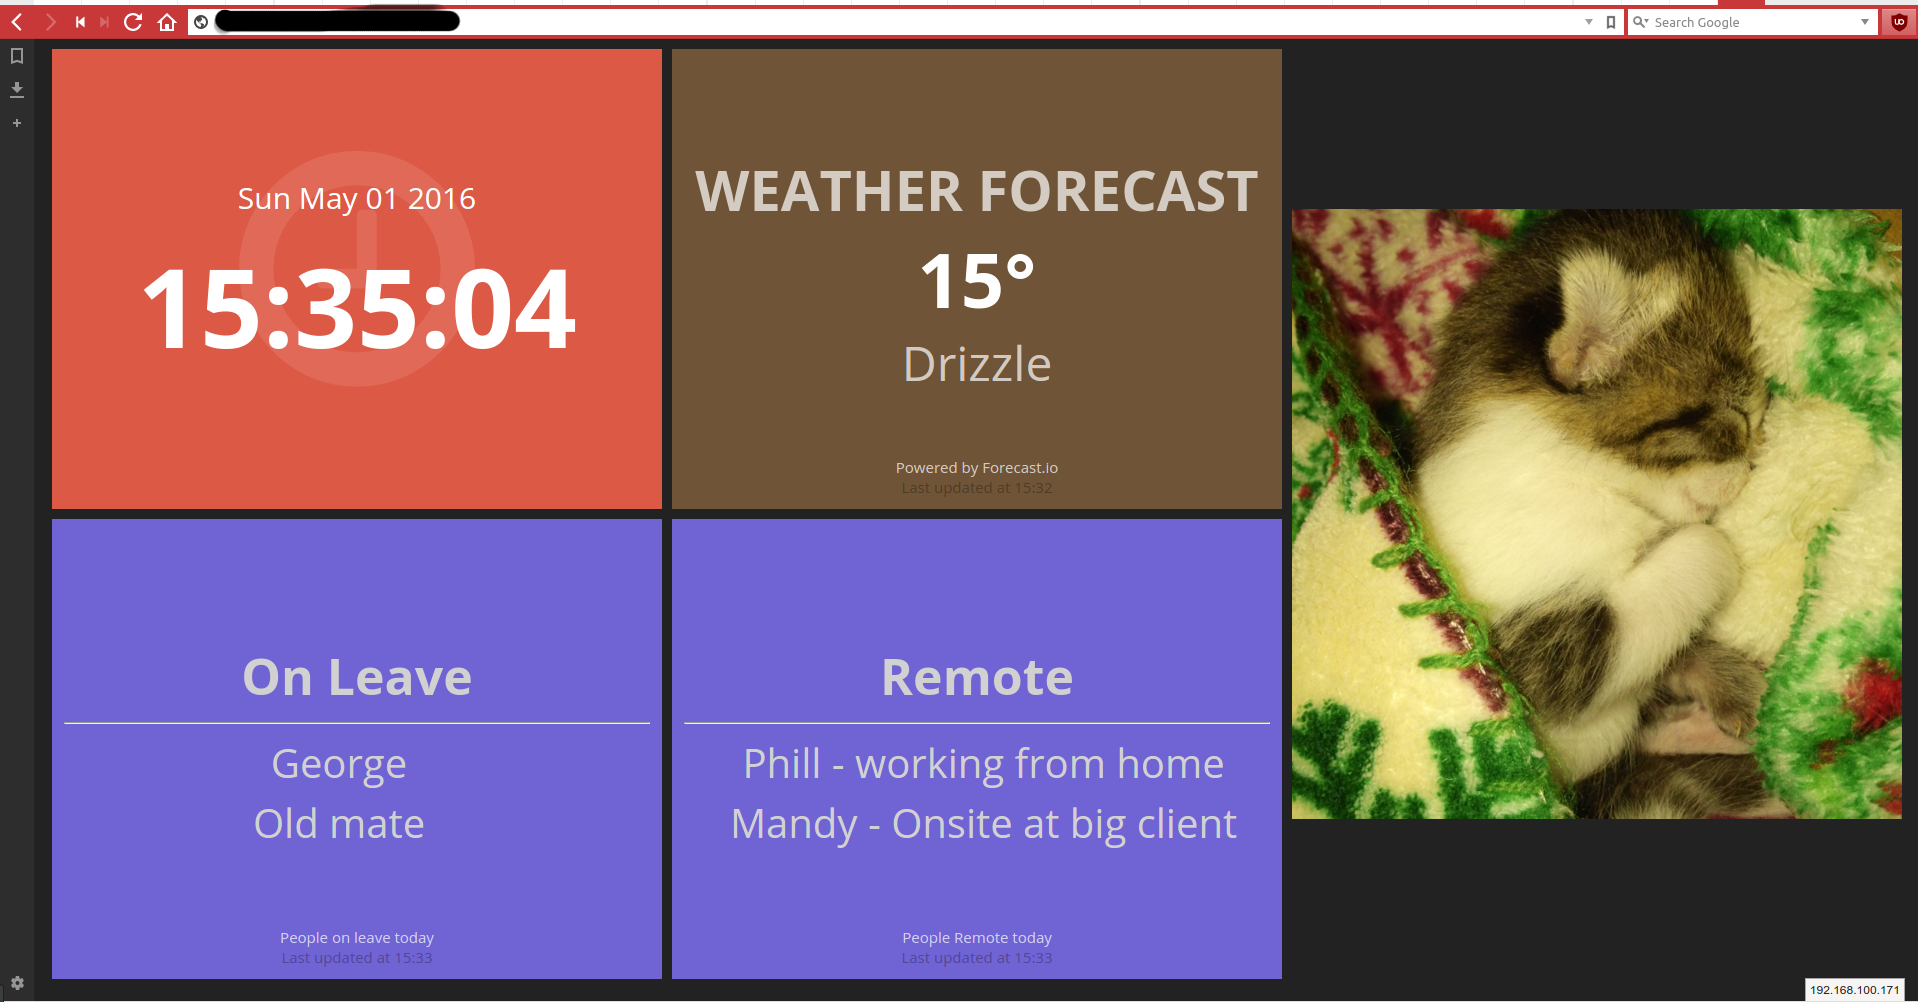
To get things setup
Install
dashingsudo gem install dashingGenerate your dashboard and bundle the gems
dashing new my-dashboard && cd my-dashboard && bundlemodify
config.ruto:- add an authtoken (useful if you want to talk to the API externally)
- disable x-frame-options. This is needed, as the dashboard controller will load dashing in an iframe. If it turned on, it will cause some issues (line 6)
- set the default dashboard that gets loaded (line 5)
require 'dashing'
configure do
  set :auth_token, 'myauthtoken'
  set :default_dashboard, 'gs'
  set :protection, :except => :frame_options
  helpers do
    def protected!
     # Put any authentication code you want in here.
     # This method is run before accessing any resource.
    end
  end
end
map Sinatra::Application.assets_prefix do
  run Sinatra::Application.sprockets
end
run Sinatra::Application
Read below about configuring the widgets, and then start!
sudo dashing start -p 80
First I had to change the way the List widget worked, so I could have 2 rows of names for the leave. This is what I had to add to widgets/list/list.html
<h1 class="title" data-bind="title"></h1>
<hr/>
<table>
    <tr><td>
<ul class="list-nostyle">
  <li data-foreach-item="itemsleft">
    <span class="label" data-bind="item.label"></span>
  </li>
</ul>
  </td>
  <td>
      <ul class="list-nostyle">
      <li data-foreach-item="itemsright">
        <span class="label" data-bind="item.label"></span>
      </li>
      </ul>
</td>
  </tr>
<p class="more-info" data-bind="moreinfo"></p>
<p class="updated-at" data-bind="updatedAtMessage"></p>
Then had to change/add some font sizes to make it look how I wanted (as the TV’s were on walls above desk area’s, I had to make sure things were big enough to read easily)
widgets/list/list.scss
  .title {
    color: $title-color;
    font-weight: bold;
    font-size: 50px;
  }

  ol, ul {
    margin: 0 5px;
    text-align: center;
    color: $label-color;
    font-size: 40px;
  }
I found this dashing widget that collects and displays reddit images, and changed it to use the subreddits I wanted (/r/aww) and combined it with the big image dashing widget to display that nice 2 row sized image
I didnt change anything in the style or html, however I just modified the job jobs/aww.rb to do it at the intervals I wanted, and included the subreddits I wanted. You can add any other subreddits to the subreddit array at the top of the script
require 'net/http'
require 'json'

placeholder = 'http://i.imgur.com/JycUgrg.jpg'
#subreddits = ['/r/aww.json','/r/animalsbeingjerks.json','/r/aww_gifs.json','/r/babyduckgifs.json']
subreddits = ['/r/aww.json']
SCHEDULER.every '300s' do
  randomreddit = subreddits.sample
  http = Net::HTTP.new('www.reddit.com')
  response = http.request(Net::HTTP::Get.new(randomreddit))
  json = JSON.parse(response.body)

  if json['data']['children'].count <= 0
    send_event('picture', image: placeholder)
  else
    urls = json['data']['children'].map{|child| child['data']['url'] }

    # Ensure we're linking directly to an image, not a gallery etc.
    valid_urls = urls.select{|url| url.downcase.end_with?('png', 'gif', 'jpg', 'jpeg')}
    send_event('picture', image: "#{valid_urls.shuffle.sample(1).first}")
  end
end
And for weather info I used this forecast.io dashing widget for the weather. Previously, in my home dashboard, I had used the verbinski widget, so I attempted to incorporate that initially. But I didn’t want the default of 3 columns of weather (Today, Tomorrow and weekly) and tried to change it to only be todays weather. It worked, but I wasnt able to make it match the rest of the tiles on the dashboard, and ended up looking out of place 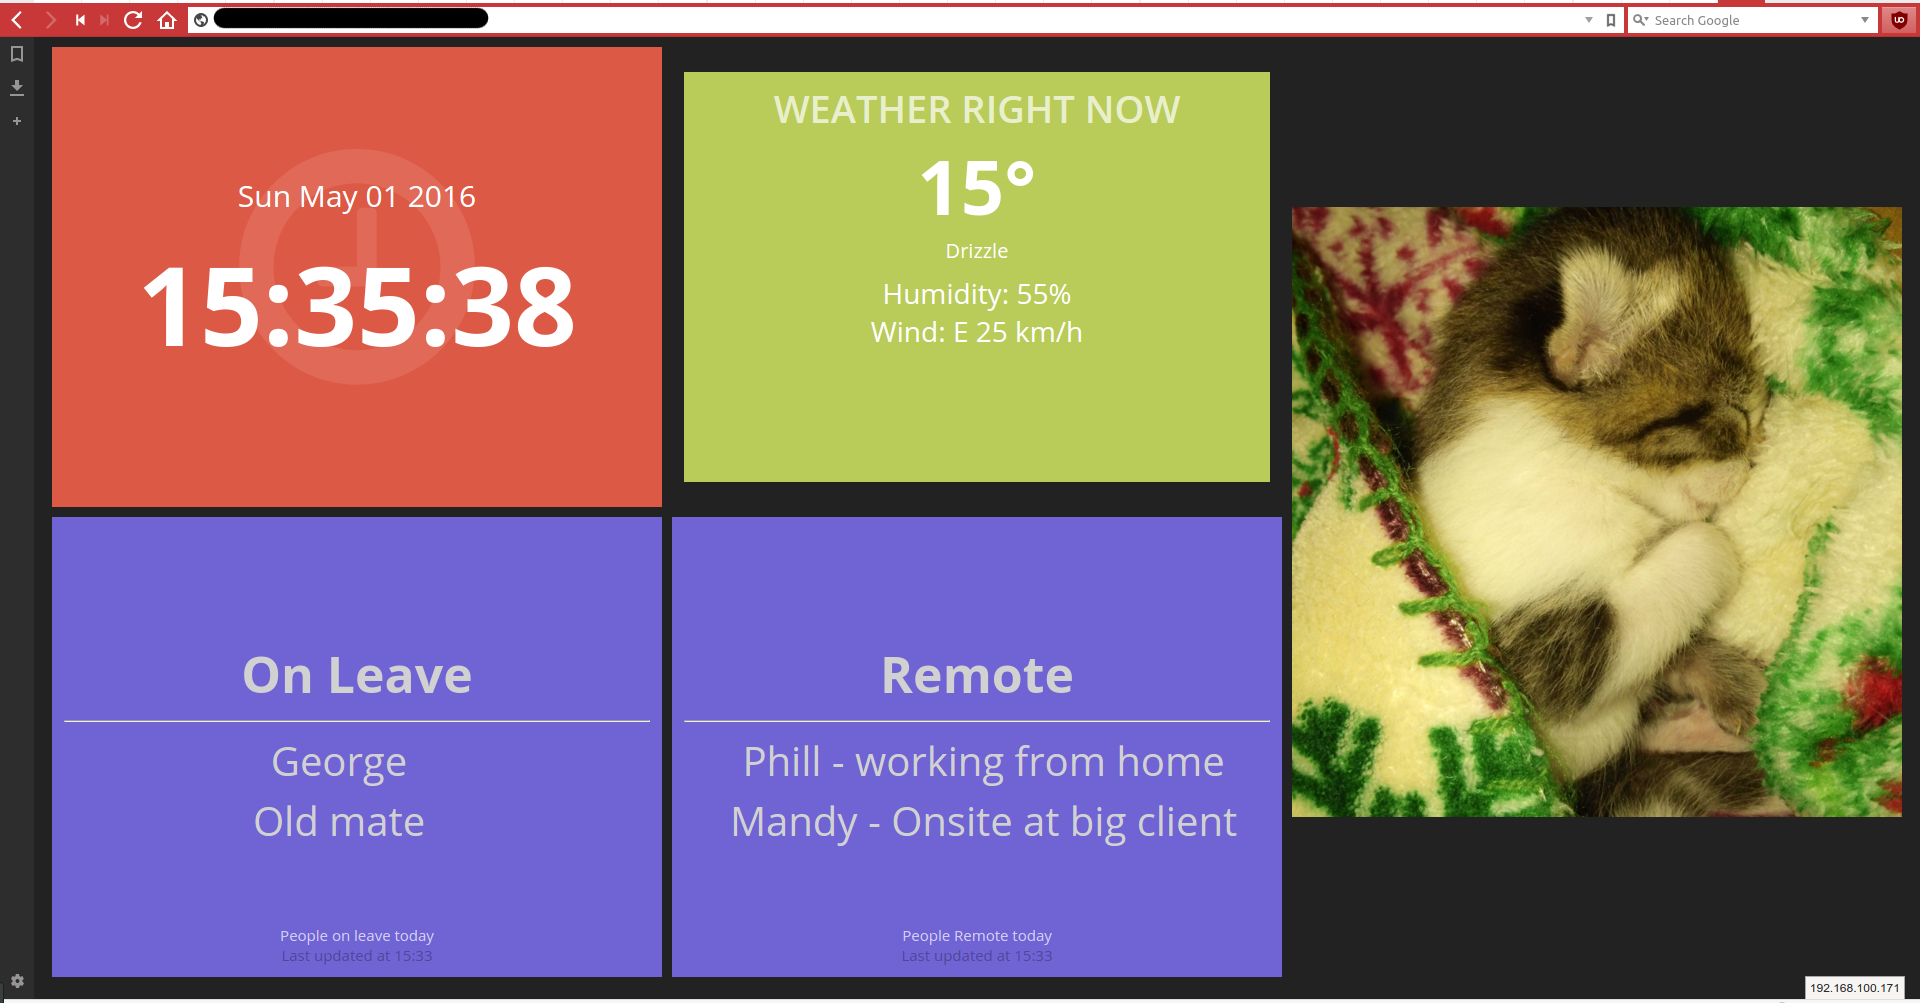
Getting calendar info into the dashboard
So because we use google calendars here (we utilise a shared calendar for leave/remote) I was able to leverage the library’s Google has created to get this info. They do have a ruby library for this, but first go I was unable to get it working (needed a new version of Ruby) So I defaulted back to use the PHP library
First you need to follow these instructions to turn calendar api access on, and configure an access token, also follow those instructions for installing the google client library from composer
So I run this as a cron job, every hour, between 6-6. I’ve modified it to just download events on the leave and remote calendars to seperate text files. This is the read into the dashboard by a ruby job, which is part of dashing (I have only included the snippet of code I modified, the rest is the same as in the google example)
// Get the API client and construct the service object.
$client = getClient();
$service = new Google_Service_Calendar($client);
$todaystart = date("Y-m-d") . "T00:00:00+10:00";
$todayend = date("Y-m-d") . "T23:59:59+10:00";
// Print the next 10 events on the user's calendar.
$calendarId = 'Goes here';
$optParams = array(
  'maxResults' => 10,
  'orderBy' => 'startTime',
  'singleEvents' => TRUE,
  'timeMin' => $todaystart,
  'timeMax' => $todayend,
);
$results = $service->events->listEvents($calendarId, $optParams);
$fh = fopen("/home/John/work-dashboard/jobs/leaveleft.txt","w");
$fh2 = fopen("/home/John/work-dashboard/jobs/leaveright.txt","w");
if (count($results->getItems()) == 0) {
  print "No upcoming events found.\n";
} else {
  print "Upcoming events:\n";
  $i = 0;
  foreach ($results->getItems() as $event) {
    $start = $event->start->dateTime;
    if (empty($start)) {
      $start = $event->start->date;
    }
    printf("%s (%s)\n", $event->getSummary(), $start);
    $data1 = $event->getSummary();
    $split = explode("-", $data1);
    $data = $split[0] . "\n";
    if($i<5){
        fwrite($fh,$data);
    }else{
        fwrite($fh2,$data);
    }

    $i++;
  }
}
And then here are the jobs that go in the dashing job folder
#leave.rb
SCHEDULER.every '360s' do
  leavep = Hash.new({ value: 0 })
  leaver = Hash.new({ value: 0 })
  File.readlines('/home/John/work-dashboard/jobs/leaveleft.txt').each do |line|
    leavep[line] = { label: line }
  end
  File.readlines('/home/John/work-dashboard/jobs/leaveright.txt').each do |line|
    leaver[line] = { label: line }
  end
  send_event('leave', { itemsleft: leavep.values })
  send_event('leave', { itemsright: leaver.values })
end

#remote.rb
SCHEDULER.every '360s' do
  leavep = Hash.new({ value: 0 })
  File.readlines('/home/george/work-dashboard/jobs/remoteleft.txt').each do |line|
    leavep[line] = { label: line }
  end
  send_event('remote', { itemsleft: leavep.values })
  #send_event('remote', { itemsright: leavep.values })
end
To make this less messy, I definitely could have got the Ruby library working, then just had it running as a job under dashing to push results directly to the dashboard, instead of having this extra script run then pull in seperate. Also merging the 2 scripts that are currently seperate (leave.rb and remote.rb) From memory I originally did this but there was issues when it was pushing things to the dashboard.
But now I have a dashboard that displays some useful information to the managers at work, without having to open up calenders and faff about with that to see who is away/remote and also gives everyone something cute to look at
I plan to create another dashboard for the “developer” area so there some more relavant information for them, such as status of TeamCity/Jenkin’s builds, git commits for the day. But that’s on the to-do list. Should be simple enough though as there are a multitude of widgets for dashing you can use here
Dashboard Controller
So as I mentioned, instead of Greenscreen I set out to find something else that could control chromecasts, but better. Thats when I found DashKiosk Pretty awesome as its a dashboard manager that can handle more then just chromecasts. Anything that can browse the web, and has as screen can be turned into a dashboard using this! The plan was to buy some raspberry pi’s and attach them to the TV, so we could have a more reliable “client”, but thankfully, the chromecastV2 worked perfectly
Pretty straight forward setup:
- Download and extract the latest dashkiosk tar ball
wget https://github.com/vincentbernat/dashkiosk/archive/v2.6.6.tar.gztar -zxvf v2.6.6.tar.gzcd dashkiosk-2.6.6/
- Install npm dependancies and build
sudo npm install#this is going to take a bit of time. Shouldnt be any errors at this stage (I got one but it was because i didnt install something at the start)sudo grunt#This also may take some time
- Test to make sure chromecasts work
avahi-browse _googlecast._tcpThis will list all the chromecasts on the network, make sure you can see them Now make sure you can resolve the name to IPgetent hosts "Dev\032Area".localIf this works, you are good to go! If not, see here
- Finish up and configure for your environment
cd distsudo npm install --production#this will take a whilesudo vim lib/config.js#change the chromecast part, where the IP address # is the IP address of the server # (Cant use domain name because chromecast uses google dns, # so unless it is public facing it wont work // Chromecast chromecast: { enabled: true, receiver: 'http://192.168.100.171:9400/receiver', app: '5E7A2C2C' },- Run it!
sudo node server.js --environment productionThis will start up on port 9400, so go tohttp://IPADDY:9400
The only issue I had was getting the chromecast module working, but that ended up being an easy fix. Had to change 1 file to turn off(?) ipv6
Some issues along the way
So the main issue with this setup is the chromecast v1 hardware. In our setup we have 2 AP’s using both bands, but the chromecasts frequently dropped out and had to reconnect. This was a pain with greenscreen as you had to manually reconnect the chromecast back up. I never got to the bottom whether it was the chromecasts, or our wifi that was the main issue. But upgrading to the Chromecastv2 was a whole lot better, much more stable and noticably faster
Let me know if you are interested, and I’ll load the whole dashing dashboard I created into github